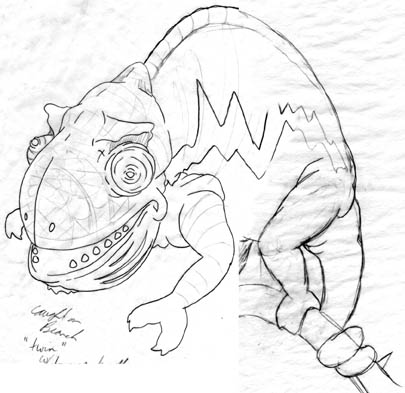
Monday, February 19, 2007

IF: Gravity


It had been a great...even fun...day at work...but upon returning home to find his favorite pet expired, Death finally understood the gravity of his job....

Saturday, February 03, 2007

IF: Sprout


How farmers know when it's time to retire...

(new student interview is up on blankenstine unplugged...see my profile)

Gesture This...Part One


One of the most helpful...and unfortunately most overlooked...of all drawing skills is gesture drawing. Young artists tend to get stuck in contour drawing mode and their work tends to be disproportionate as well as 'stiff'. Breaking items down into shapes lightly is a big breakthrough and helps their work to improve. But one of the greatest tools is the gesture drawing. Quick linework attempting to capture the 'essence' of the item being drawn, with its 'mass', form, and gesture can help keep drawings from being stiff as well as helping to keep things in proportion. It can also help to work out 'visual problems' such as items receding in space.
There tends to be a mental block for some reason with students of all ages with gesture drawing. The idea is to have a direct 'connection' from the eye to the hand without 'thinking'...our eyes tend to 'study' objects in what seems like a random roaming pattern...bouncing all over...as opposed to in a top to bottom 'scanner' approach. As our eyes move our hand moves across the mass of the object. But once this method clicks with the artist it becomes and art form all in itself.
After getting the initial gesture down using a H pencil, the artist can begin to add detail and make corrections with a softer graphite. The gesture will then start to fade to the back and the drawing will have more of a life. As the renderer gets more adept at the skill, they will find out that when using reference pictures that the scale proportion will be pretty accurate. And when no reference picture is used, a mental image can be captured on the page that has action and is not so 'static'.

A good way to practice gesture drawing in the beginning is to take a magazine or print a variety of pictures and do multiple gesture drawings. Remember, quick and spontaneous with the eye 'bypassing' the brain and flowing through the arm to the pencil is the key.

Saturday, January 20, 2007

IF: Super Hero


They told Bernie wearing the Super Hero Sandwich costume only gave him the power to hand out coupons on the street corner for minimum wage...but when he saw the run-away bus come by he just couldn't help himself...

Thursday, January 18, 2007

Things That Go Bump In The Night: Part II


(Click to enlarge.)

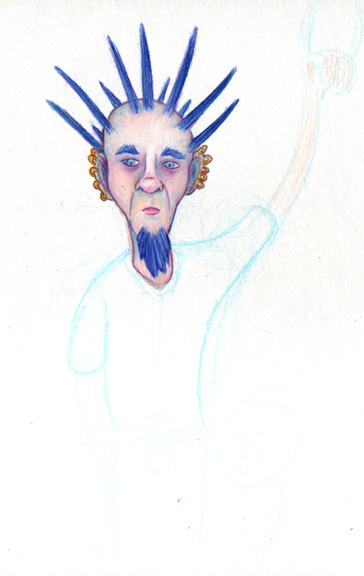
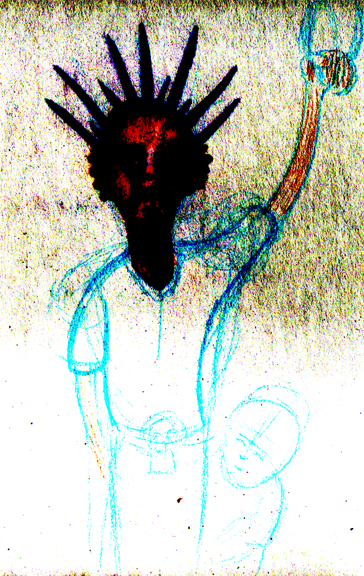
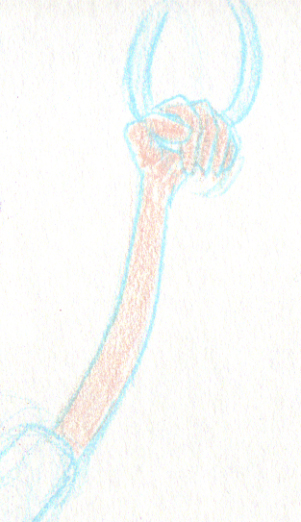
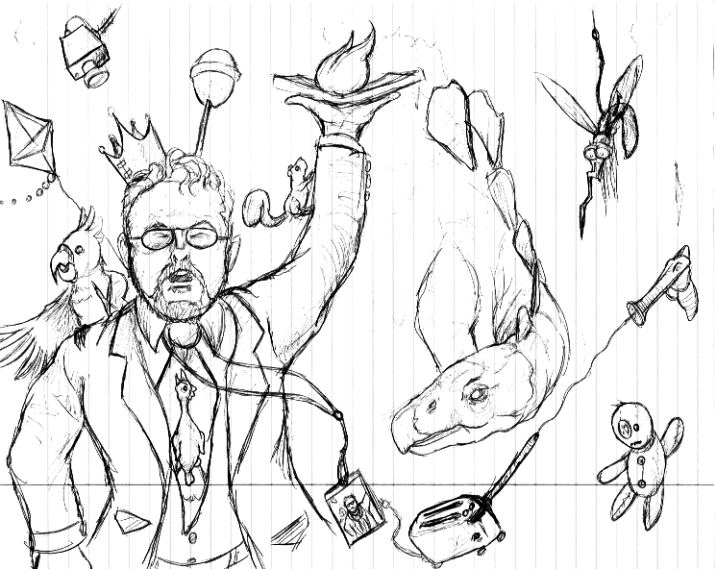
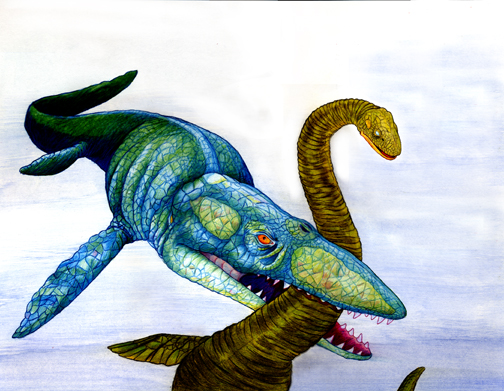
After I drew the full body pic I knew I wanted to draw a closeup, more detailed pic. It took me until a couple of days ago (about 3 months) to get around to it...I debated about using colored pencil but decided to stick with graphite (2B and HB pencil) to stay in line with the first drawing and I knew it would be a lot quicker than with the color...plus I've always liked the look of graphite. One thing to remember, it is always a good idea to take a break from a drawing and go back to work on it with fresh eyes...and it also helps when working with graphite to use a piece of tracing paper under your drawing hand to keep from smearing the work so much.

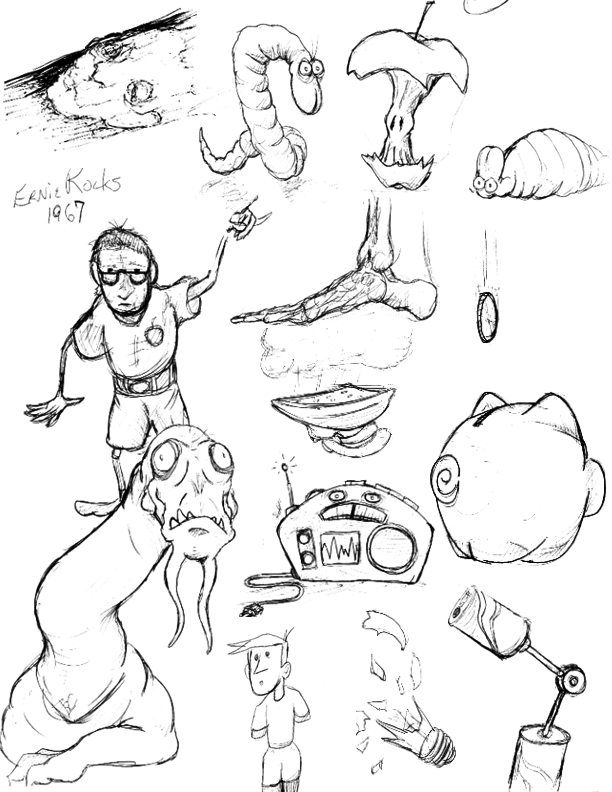
Once I completed this I knew how to set the students project up. I pulled two descriptions of the chupacabras (cryptomundo.com and wikipedia), described one real weird looking animal, and pulled a description for a cryptid creature that turned out to be real (americanmonsters.com). The point...how descriptions, witnesses, and reality can often vary.
They are as follows:

Strange Animal One:
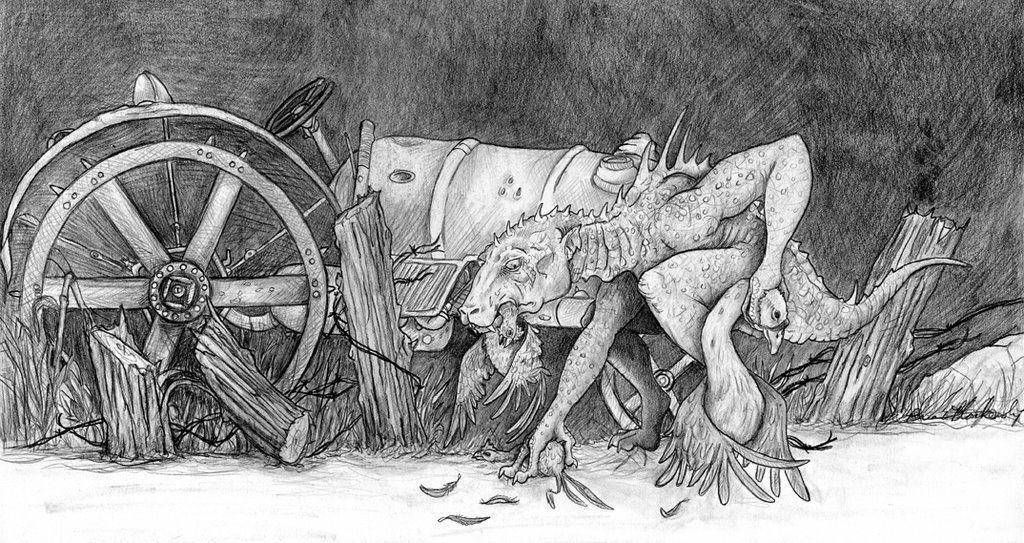
While a buddy and I was fishing we saw a strange animal swim underneath of us…It seemed like a cross between a fish, squid, and sea mammal of some sort. The skin was slick and ranged from a purple/pink to almost transparent around the ribs…there app
eared to be small spots on its nose’ like the coloration on a squid. And speaking of squid, that nose was like a composite of a duckbill and a squid’s tentacle…it almost reminded you of the form of women’s shoes during the middle ages. Its body was like that of a carp but with long flippers that looked like the nose…only slightly smaller. The eyes were set pretty high up on the head and were like two small black stones. Shortly behind the eyes was a single spine. The rear portion of the creature had two small fish-like fins, but the tail tapered off like a lizards, except it had small series of fins or feathers that lined the last ¾’s of it.

Strange Creature Two:
A lizard-like being, appearing to have leathery or scaly greenish-gray skin and sharp spines or quills running down its back. This form stands approximately 3 to 4 feet (1 to 1.2 m) high, and stands and hops in a similar fashion to a kangaroo. In at least one sighting, the creature hopped 20 feet (6 m). This variety is said to have a dog or panther-like nose and face, a forked tongue protruding from it, large fangs, and to hiss and screech when alarmed, as well as leave a sulfuric stench behind. Some reports note that the creatures have pronounced eye sockets, teeth, and claws.

Strange Creature Three:
A five-foot tall humanoid reptilian body, oval head and pointy chin, bulging red eyes, fanged teeth and long, darting tongue, no ears but with auditory holes. Small holes for nostrils and a lipless mouth. It had a thin neck and thin arms with three fingered hands that had sharp claws. Sometimes reported as having bat-like leathery wings.

Strange Creature Four:
Body the size of a camel with a similar face...slightly longer and narrower…leopard-like spots, and two, large, curving horns. Appears to be the result of the cross breeding of the two animals. There can appear to 5 such knotted horns on some of the animals. Long front legs and shorter rear legs. Long snake-like tail.

Students will then follow the creative process to do illustrations to be used for some Photoshop work and 'aged' soft book covers.

Things That Go Bump In The Night: Part 1


(As always, click the pic for a much larger view.)

A couple of months ago I was over at Cryptomundo.com looking over the posts. As previously stated, I like to visit there because I enjoy 'critters' and it always gets the imagination firing. Loren Coleman (really nice guy, Cryptozoologist (among other areas of expertise) and one of the many great gurus on the site...) was talking about a picture of a chupacabras that he had on a post and how there weren't many of the creature 'in action'. That got me thinking and gave me a good opportunity to draw.

With such creatures there are always eyewitness testimonies and the occasional sketch by the viewer. And then there are those that act like police sketch artists and take the information and draw from descriptions. Having just weeks before seen a show on National Geographic about chupacabras, I was amazed at how quickly natural phenomenon or explainable events were turned into stories of chupy attacks that spread across entire countries...and how varied the descriptions of the creature was. So I searched the net for written descriptions and drew based upon the following:

A lizard-like being, appearing to have leathery or scaly greenish-gray skin and sharp spines or quills running down its back. This form stands approximately 3 to 4 feet (1 to 1.2 m) high, and stands and hops in a similar fashion to a kangaroo. In at least one sighting, the creature hopped 20 feet (6 m). This variety is said to have a dog or panther-like nose and face, a forked tongue protruding from it, large fangs, and to hiss and screech when alarmed, as well as leave a sulfuric stench behind. Some reports note that the creatures have pronounced eye sockets, teeth, and claws.

I chose this version over the more 'alien-like' descriptions because it just seems much more believable and makes more 'sense' visually for the chance to be a real creature...although I'm not really buying this cryptocreature at all...bigfoot, sea serpents you can sell me on...but not this guy...(and the show did a good job of showing how insects could account for many of the freakish events)...

Next up...The Project...

Sunday, January 14, 2007

IF:Eighties


Bambi had the speedometer pegged into the high 80's when she caught a glimpse of her husband picking his nose...perfect time for a brake check...

Saturday, January 06, 2007

The Thin Blue Line


There are generally two techniques I use when prepping to draw with colored pencil. The first is described elsewhere on here (and on my Unmasked portion) using tracing paper to refine and transfer a ghost image for further drawing. Here I will describe a method I've seen on multiple occasions from cartoonists and animators hand has been used on all of my Illustration Friday (IF) colored pencil works.

I prefer to use Prismacolor pencils because of the blending quality. The only knock I have against these pencils is that sometimes in shipment they can get flexed or dropped and the 'lead' gets broken inside the pencil. When this happens and you go to sharpen them the 'lead' will just continue fall out of the wood casing. Other pencils I've tried are too hard and will not blend smoothly.


First I start with a light blue pencil to draw in the general shapes. Light blue generally does not transfer to scanners or copiers and is also used when marking mechanicals for layouts (such as magazines). In the first picture you can only see the blue lines I have darkened in heavily but in reality the entire figure is sketched in (the head has already been through the entire process and is pretty complete). Visually the light blue will disappear or can be easily blended into the other colors. When starting off with traditional graphite to rough in the shapes or leave a ghost image the problem is that the lead will often streak into your colored pencils. This will make your colors look dirty as opposed to vibrant.


This version shows the same pic with the levels adjusted so you can see the other lines.

As far as coloring as a whole...this is one method I use to help blend colors (and was used on all colored pencil drawings on my entire blog except where areas of fur are present)...I stumbled upon it the first time I used colored pencils doing a portrait because I didn't like the white patches from the tooth of the paper. I kept coloring heavier and heavier 'burnishing' the colored pencils in thickly and noticed that while doing this I could work in almost a painterly fashion blending colors. Now I use both methods depending upon the situation, as the softer touch is definitely better for a furry look.


I lay down a base color lightly.


I then go over the base color heavily with white. You can't tell a whole lot from this pic, but the white and base have started mixing and it provides a base to mix on top of...


I will then go over the arm again with the same base color or a slightly darker color. Then I will use white or a lighter color to start blending. I will finally hatch in blues or reds and use the light base color to blend again for a softer look.

This will build up a rather thick coat of color. After a while of working the area you might need to work lighter at times. If not you will start flaking off the color!

Finally, to add in details you just need a sharp colored pencil and you will be etching in to the thick layer of color you laid down.

TIPS:
This technique works best on illustration board.
Make sure to have a brush or to knock of your drawing board often as this method will leave a lot of colored fragments that can get smeared.
Have a couple of white colored pencils because you will burn a half a pencil up on a moderately size drawing.
If you are drawing 'tight refined' lines, spin your pencil after each stroke and it will help to maintain a sharp point without needing to sharpen the pencil.
After you work is complete use a fixative spray on the work. It will prevent wax bloom which can severely dull your colors.

IF: BUZZZZZ


Arthur thought the buzz at his chest was his pacemaker malfunctioning, resulting in a call to glory...in reality it was the buzz from a pager he had forgotten in his shirt pocket, heralding a call from his wife to pick up a jar of fiber pills on his way home...

Monday, January 01, 2007

IF: Phoenix


The molting of the phoenix is only slightly less spectacular than its rising from the ashes...

Thursday, December 28, 2006

Just DRAW...2nd Edition


The artistic mind...left brain/right brain mass of confusion...When the artistic mind has to sit down and 'listen' for extended periods of time we tend to shut down quicker than most people. But we have a secret weapon...we can DRAW!!! And by drawing we are able to activate both sides of our brain and actually pay BETTER attention than most...(WARNING: you may be called to prove this and it can make or break your case...if you are in class and a teacher asks a question you should be able to know accurately what is going on...same thing with meetings in the real world...and if you tend to daydream and get lost in your doodles and get asked a pointed question resulting in you falling out of your seat and saying 'huh?'...well, sorry but you best be using your drawing utensils for taking accurate notes...) And be careful if you have non-artistic neighbors sitting beside you...their snickers can get you on the hot seat so try to be somewhat discreet so as not to appear rude...

It may take some explaining and proof at first but give it a whirl and see which camp you fall in...and again...SAVE YOUR DOODLES SOMEWHERE SOMEHOW!!! You never know when something might come in handy (see my other blog Unmasked where the horse worked out!)


Sketches done during an Education class last spring...the topic for the evening...we discussed administration's role with regards to teachers in the classroom...Varied items including one of my coworkers that had a mullet back in the day and went to school where I teach...and he probably hadn't even been born in 67 but it seemed funny at the time...


Last fall a speaker squeaked a 45 minute presentation into 3 hours...the holder of knowledge of all things fire extinguishers...


Education class talking about cameras in schools...reminded me of my favorite big box store and a guy I used to know that regulated safety/security at one...I just kept getting goofier and goofier as I drew trying to capture the greeter of the future...

Monday, December 25, 2006

IF:Let Us Make Peace


Mistranslating the pre-arrival transmission as "Let Us Make Peas" made for a rather uncomfortable first meeting with the pod people from the DelMonte galaxy...

Tuesday, December 19, 2006

IF:Help...


A public restroom, an empty roll of toilet paper, a mime, and a desperate cry for help...(or 'why mimes should always check to make sure their paperwork can be completed before they make a big commitment')...

Friday, December 15, 2006

An acronym for the ages...


We have all heard the saying...By failing to prepare you are preparing to fail...and it is true. But a more colorful and attention getting way to say this is simply PPPEPPR...But what does it mean?

It means when you have a deadline looming it is important to follow the creative process to work out potential problems before you waste time...it means to pay attention to the message and audience so the problem is answered correctly...it means you need to not find a solution but to find the best solution...it means it is important to budget one's time to allow for adjustments to the product...it means to be self-critical to cut down on obvious mistakes in design or technique...it means putting forth focused effort to produce quality rendered items instead of mindless scribbling...it means that you are on display and what and how you do something says something about you...perhaps in no other field are you truly so judged by your work...and by not doing these things you produce bad work that will result in redo's, poor grades, a bad reputation, extra stress, or even firing if you should be in that position. (I'm also a fan of 'if you don't have time to do it right the first time you obviously have time to do it again...but it isn't nearly as catchy...)

So what does PPPEPPR mean? Poop Poor Planning Equals Poop Poor Results...funny, I know...but TRUE...and unfortunately, we as artists can tend to be scatter-brained procrastinators...but by developing good planning skills (and it does take effort on our part to do this) the majority of issues can be resolved in a much more stress-free way, making our art more enjoyable for us and more visually pleasing for the viewer...

Friday, December 08, 2006

IF: Mask


Uncle Melvin smelled so bad that he wore a skunk around his neck to try and mask the odor...maybe he should've tried for two...

Wednesday, December 06, 2006

WHAT THE?!?!


I have had several people contact me with regards to 'the process' and ask me some very good questions. I had never really intended for this blog to be an 'indepth process showing' area (partially because there are already so many great blogs out there with such great information)...it was meant to be a bit of a diary for myself as well as showing tips/tricks/tidbits for my students or others that might stumble upon it. I think other folks' blogs have shown a great deal of inspirational work that have helped keep my creative fire going.

In order to keep this blog 'cleaner' and to be able to show a strong indepth process from start to finish, I have started one more blog. This will help me to be more flexible with the work I can show here as well as to keep from breaking up the process too much, as I have no idea how long it will take to do what I want to do. On 'blankenstine unmasked' I will be attempting to show an entire process as well as doing the same illustration in multiple media.

As I use these blogs for teaching purposes and multiple voices can help the students to see how the real world works (both college and work), I appreciate any feedback you may want to leave...

And the pic? This was one of only a couple of shots from the zoo that had some personality (and no...it isn't me...)

Tuesday, December 05, 2006

Let it breath...


A good thing for an artist to be able to do is create strong mental images of what they are working towards. After this some people follow the process to refine the work and some (more of the fine artists) refine their work 'on the canvas'. Either way it is important to let your work give itself some of the direction. Never be 'married' to a piece so much that you are afraid to let yourself go and try new things. Usually when I talk to an artist about a piece I really like, I hear the same story...The core idea stayed...but as they worked, the image pulled them in different directions...and it always turned out better than their original concept.

Between working on the computer vs. traditional methods the computer does have one advantage. The undo button. Those working in more traditional methods are sometimes apprehensive about trying new things or trying to experiment on a piece that may get 'ruined' in the process. This apprehension can sometimes move over into the digital arena as well and the work can end up a bit lifeless and overly sterile. Recently viewing an item on IF people liked the sketch more than the digital work. This is because during the sketching phase the drawings usually seem to have more personality and life.

In this piece I had planned on continuing my traditional ways...I had everything laid out and ready to transfer to illustration board...I had a strong image in my mind of what and how I was going to do things...but my coloring hand was begging me to give it a rest. So I went digital. As I was going I noticed several things that didn't transfer well digitally...mostly the legs (but the heads had issues as well). No matter what I did they just didn't have that whimsy that I wanted, so I switched to the current version...I let the work 'breath' or dictate what 'looked' right in the given situation.

Friday, December 01, 2006

IF: Might...


Those pigeons might not dirty any cars...that dog might not wet that hydrant...that guy might not be Irish...and he might not be wearing a bad toupee...and she might not say,"No"...but I wouldn't bet on any of it...

Thursday, November 30, 2006

Why it's obvious what we have here before us is...

In the previous post I discussed a little about paleo-art and the guesswork that is involved. Some of it is educated guess work (such as ligament scarring on bones helping to show muscle attachment)...but some of it is just plain old make believe (such as when a single toe bone is found, a complete skeleton is reconstructed, and an art piece created showing what the creature was...and very often the fact it is based on a single small piece is a hidden from the audience).


About a month or so ago while going over a cryptozoology website (www.cryptomundo.com if you want to check it out) there was listed a report that a Russian fishing vessel had found an unknown bit of skeleton that perhaps belonged to some sort of sea monster. Later several people came online to help identify the skull...but it was funny to see all of the people guessing as to what the creature might be...showing how our imagination can sometimes can get the best of us (which isn't always a bad thing).


I read the general story to my class and then showed them a brief glimpse of the rotting corpse. I then gave each student a copy of a clean skull and asked them to 1) Render the skull by using basic drawing techniques 2)Flesh out the skull to depict what the head of the creature might look like 3)Draw a smaller version of their head with a body of what they thought the entire creature might look like. We mostly got dinosaur type pictures (which is what the Russians believed the creature to be.)


After they had completed the exercise I showed them what the creature actually was! It is hard to imagine that the real creature could 'come' from the skull presented...and if we didn't have a living example to directly compare the skull to I wonder what the scientists would would imagine it to be...


Since I was due for another drawing for my kids, and I was enjoying the computer free zone for a bit, I threw my hat in the ring on this project. I started with a quick gesture drawing of what I wanted to do, grabbed a big honkin' piece of illustration board, and went to work. I didn't like the plain white background this time so I used a splash of water color. I knew I would never be able to to use Prismacolor on such a large background ...too hard to try to match up the stroke work in sections and I would need about 75 pencils by the time the board 'chewed' them up...so it is a safe option for filling space quickly. I was also careful to keep the brush strokes 'visible' to add some visual interest.