it isn't something that we are focusing on in class (although I do try
to throw them acurve ball from time to time). Sometimes I am asked "How
do you do (fill in the blank)?" There isn't always a
straight-down-the-line answer to this question as there are often
multiple ways to do things. I think the real question that they want to
ask is "I've never done (fill in the blank) and I want it to come out
looking like it is going to hang in a museum on my first attempt...how
do I do it without a sense of failure and having that fear over my
shoulder the entire time?" The best way to do something you've never
done is...well to just do it. I realize (and try to give) basic
instruction for some 'new' things. ..But the reality is it is difficult
to explain how certain media will react under certain circumstances and
to get it to look nice...Explanation can never take the place of
experience...As artists we tend to be 'hands-on' and no amount of
explaining is going to give you the 'personal' touch of having done
something. You just have to push yourself out of your comfort zone and
see what happens. Sometimes it is going to be a major mess and
sometimes it is going to turn out okay. Either way you can always learn
and garner another 'tool for the trade'. I always enjoy and encourage
my students to give something a try in different media. The first pangs
of frustration are generally overcome with time and practice.

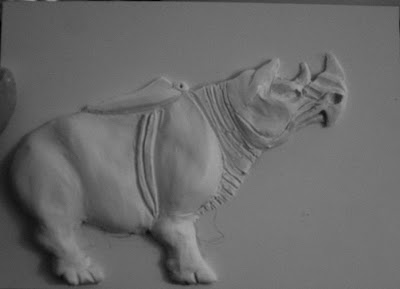
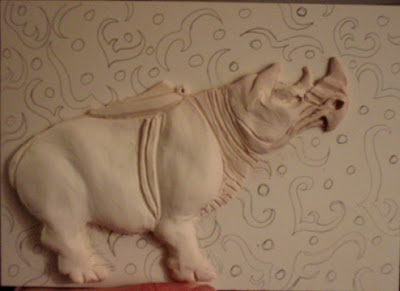
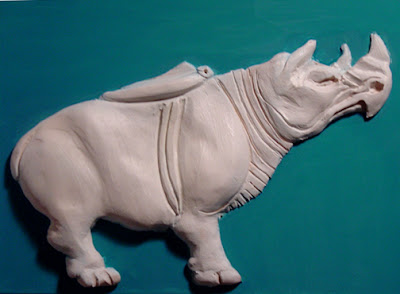
I had always wanted to do a 'relief' type illustration where the image protrudes from the picture plane as well as wanting to work on claybord. While going through an art history book I have I ran across a rhino vessel from the late Eastern Zhou Period. I figured since I was on a bit of a break I would give it a try and start to get a feel for both. I started by drawing out an outline of the rhino to use for a separate illustration. The claybord didn't hold the graphite like I thought it would so I figured I would use the outline as my template. I had purchased a small block of Super Sculpy for $1.77 and started to mold it to the panel.
Typically when you do a form on a panel you want to have anchors present to help hold the Sculpy in place. I had a horrible time in the beginning because I didn't do
this (I lacked a drill and was afraid if I just screwed in screws it
would crack the panel) and the head kept sliding around all over the
place. Once I started adding in the body it held in place a lot better.
I used some plastic clay tools to help etch in cuts and to curve the
form, but a lot of smoothing I just used my finger (Sculpy is also easy to smooth without worrying so much about gobbing up).

After I got the form down I fired it in my oven. Super Sculpy
has the advantage over traditional clay because it can be fired at a
lower temp in your oven, it doesn't shrink when fired, and it is much
less prone to holding air bubbles or cracking. After the baking I used
sand paper to clean up some of the lines and edges. I then found a
design from the same period and drew it in the background. I started to
ink it in and found I wasn't happy with the way it laid on top of the
panel.

I finally decided to just use a flat color on the
back so painted it in with an acrylic ink. The real issue began when I
tried to paint the rhino. The original vessel was bronze,gilded with
gold and decorated with silver. I had some acrylic gold and silver ink
and thought it was going to be an easy job to finish up. And then chaos
had her reign. The Sculpy resisted the ink and the spray primer I had
wasn't a good match for the project...having previously used the primer
for another painting project I was afraid that I would go through all
of that work and then have to sand it down. The silver was left as a
watery grey schmoo so I tried to wipe it off with a rag and see how that
looked...bad. I ran the whole plate under water (which washed off all
of the ink...even the background) and spent the next bit drying and
repainting. Thanks to capillary action and not being able to get the
water molecules that remained in some of the cracks, the ink kept
'bleeding up' on to the piece. So a 5 minute job turned into a two-hour
battle of washing, sanding, drying and repainting. My final step will
be to add some design work and finish cleaning up the panel...although
I do like the contrast of the flat panel with the white form.
The important thing is that I tried something I had never done
before...wanted to scrap it 50 times while doing it...but completed it
enough that I LEARNED some things (good and bad) that can be used later
on down the road. It's not going to hang in a museum anywhere but I
think it can be touched up enough that I don't mind having my name
attached to it...

4 comments:
There is a great lesson here. Thanks for posting it. I am impressed with the rhino.
Man air bubbles are not to be poo - pooed. They rock. Nothing is cooler than sculpting something so hard core that it blows up and takes about 6 pieces with it. It is survival of the fittest when it comes to pottery mishaps. I think it is awesome. It could use butterfly wings though. :)
it's fun to see your thinking process, professor. i know of the turqouise ceramic rhino artifact you speak of.
rebma
Wow! Great work! Really love reading the process.
Post a Comment